วิธีปรับเทียบคัลเลอริมิเตอร์ 3nh
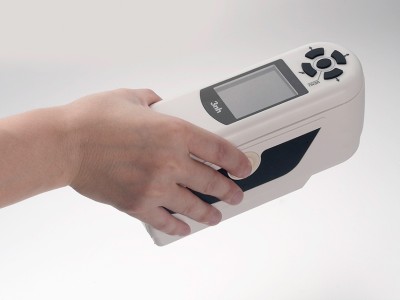
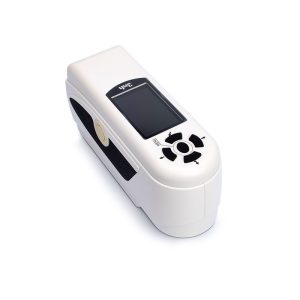 ต่อไปนี้เป็นวิธีการสอบเทียบสำหรับคัลเลอริมิเตอร์ที่ 3, ใช้รุ่น NH310 และ TS7036 เป็นตัวอย่าง 3nh.sh.cn:
Calibration of NH310 Colorimeter
- Automatic calibration: ที่ NH310is designed to automatically perform white and black calibration during startup. When the instrument’s display enters the measurement interface after power – บน, the automatic calibration is already complete, and you can then remove the white – board cover for color difference measurement. If the white – board cover is not properly attached or is loose, the instrument will enter the “Automatic White – board Calibration Failed” interface after power – บน, with options to “Retry White – board Calibration” หรือ “Exit White – board Calibration”.
- Manual calibration: Press “Menu” after the colorimeter is turned on and started up to enter the main menu, and select “สีดำ – White Calibration” to enter the black – white calibration interface. Make sure the white – board cover is tightly connected to the instrument, select “White – board Calibration” and press the “Confirm” button. อินเทอร์เฟซการแสดงผลจะแจ้งให้คุณวางไวท์บอร์ดอย่างถูกต้อง, แล้วกดปุ่ม “Confirm” หรือปุ่มวัดอีกครั้งเพื่อให้เป็นสีขาว – การสอบเทียบบอร์ด. หลังจากนั้น, รับรองว่าขาวแน่นอน – ฝาครอบบอร์ดถูกถอดออกแล้ว, select “สีดำ – board Calibration” and press the “Confirm” button. อินเทอร์เฟซการแสดงผลจะแจ้งให้คุณชี้พอร์ตการวัดไปที่อากาศ. ในเวลานี้, ชี้คัลเลอริมิเตอร์ขึ้นไปในอากาศ, and press the “Confirm” หรือปุ่มวัดอีกครั้งเพื่อให้เป็นสีดำ – การสอบเทียบบอร์ด. ควรสังเกตว่าเมื่อเครื่องดนตรีแสดงสีดำ – การสอบเทียบบอร์ดกับอากาศ, สภาพแวดล้อมโดยรอบควรมืดโดยไม่มีแหล่งกำเนิดแสงสว่าง, และไม่ควรมีสิ่งกีดขวางภายใน 3 เมตรในทิศทางที่เครื่องมือหันหน้าไปทางอากาศ.
การสอบเทียบเครื่องวัดสีสเปกโตรโฟโตเมตริก TS7036
ในส่วนต่อประสานการวัด, press the main menu button to enter the main menu interface, and in other interfaces, you can enter the main menu by clicking the confirm button or the return button. In the main menu, click “สีดำ – White Calibration” to enter the “สีดำ – White Calibration” interface, which will display whether the current calibration is valid and the remaining valid calibration time. Then click “ต่อไป” to continue the operation and enter the reflective black – calibration interface. According to the prompt, attach the measurement port to the black – tube light trap and click the “Measurement” button to perform black – calibration, or click the “Return” button to cancel the calibration. After the reflective black – calibration is completed, it will enter the reflective white – calibration interface. According to the prompt, make sure the measurement white – board number and the measurement port setting are correct, attach the instrument’s measurement port to the white board, and then gently press the “Measurement” button to perform white – calibration. Click the “Return” button to cancel the calibration if needed. After the reflective white – calibration is completed, it will jump back to the calibration interface, displaying the remaining valid calibration time. Perform the corresponding operations according to your needs, and clicking the “Return” button will return to the standard – sample measurement interface.
Learn more
https://www.threenh.com/Color_Knowledge/Colorimeter_vs_Spectrophotometer_Principles_Key_Differences.html